
Thanks for visiting! In relation to the length of time I have been practicing my other crafts, crocheting is quite new to me. I taught myself how to crochet in 2015 when I was laid up with the shingles. I had some yarn from my grandmother laying around and taught myself how to make granny square after granny square. The final result was a lap-ghan that I did not love, so I gifted it to my mom. She still uses it, so I am glad someone liked it. Until this year, I dabbled in a few things but I still always leaned more towards knitting. But, I’ve really dove head first into it this year. I’ll list my crochet projects below for you to check out.
I wanted to put together a couple of posts on some simple crochet techniques and guide you through a really cute and fun project.
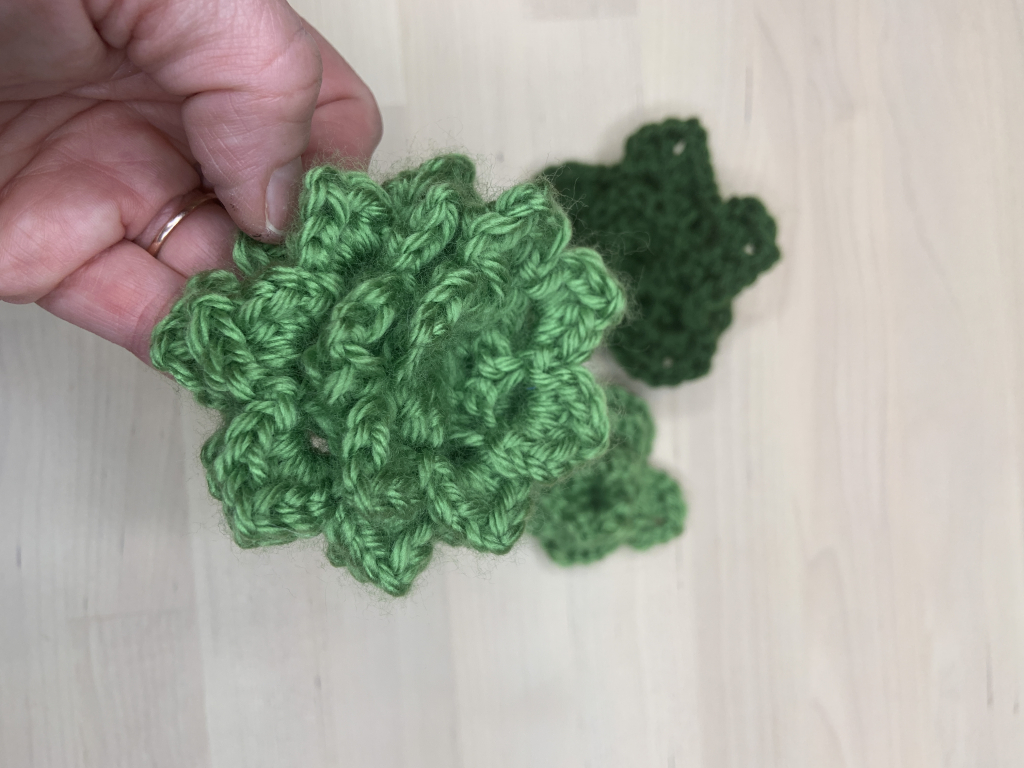
A succulent!
Let’s Get Started
Crocheting, similar to knitting, poses many benefits to mental health. There are so many articles about this on the internet (see my previous post here) that I thought I’d give you my perspective on some differences between the two that I notice.
Crochet: moves a lot faster, easier on your hands, uses more yarn
Knitting: more flexibility for creative designs/patterns, I like the knit look better for some things, takes more time (draws more focus, resulting in more mindfulness)
I have been crocheting for about six years now and I found it easier to learn than knitting. I like to crochet things like dishcloths, afghans, some sweaters and home décor items. Crochet has a very distinct look to it. It is also what is used to make lace and doilies, though that is somewhat advanced work.
Today, I will take you through what you will require to make a succulent.
What you will need:
Yarn: 4 or 5 weight (worsted weight)
Crochet hook: Match the size on your yarn label. Likely close to 5mm.
Scissors
TIME REQUIRED: Give yourself a minimum of half an hour
Chain Stitch
The first stitch you need to know is the chain stitch. You will start with your slip knot (from Knitting Essentials) on your crochet hook. Hold your crochet hook in your dominant hand. With your working yarn in your other hand grab the yarn with your hook and pull it through your slip knot. (You want to keep this fairly loose, as you will be crocheting back into these stitches.) That is one chain stitch.
View the video tutorial by We Are Knitters
Single Crochet
Insert your crochet hook into the specified stitch/space (for practice purposes, use the second chain stitch from your hook). Grab the yarn with your hook and pull it through the stitch/space. You will have two stitches on your hook. Then grab the yarn again with your hook and pull it through both stitches on your hook. That is a single crochet.
View the video tutorial by We Are Knitters
Double Crochet
Wrap your yarn around your crochet hook and insert your hook into the specified stitch/space (for practice purposes, use the next chain stitch). Then grab the yarn with your hook and pull it through the stitch. You will have three stitches on your hook. Wrap the yarn around your hook again and pull it through the first two stitches on your hook. You will have two stitches on your hook. Finally, wrap the yarn around your hook and pull it through the final two stitches. That is a double crochet.
View the video tutorial by We Are Knitters
Half Double Crochet
Wrap the yarn around your crochet hook and insert your hook into the specified stitch/space (for practice purposes, use the next chain stitch). Then grab the yarn with your hook and pull it through the stitch. You will have three stitches on your hook. This time, wrap the yarn around your hook again and pull it through ALL of the stitches on your hook. That is a half double crochet.
View the video tutorial by We Are Knitters
Those are the only stitches that we will need for tomorrow so spend some time practicing these and we will be back tomorrow to make our crocheted succulents!
-e


Leave a Reply